

Set Up SSO with Okta (OIDC)
With Okta connected, your team opens Featureflip with the same Okta account they use for everything else at work. Setup takes about fifteen minutes and needs one new app integration in Okta.
SSO is on the Business plan and above. The single sign-on overview explains the settings that are the same for every provider, such as the access policy and what requiring SSO does.
You need:
- An Okta account with permission to create app integrations (Super Administrator or Application Administrator).
- The Owner role in your Featureflip organization.
- DNS access for your team’s email domain.
1. Verify your email domain in Featureflip
Section titled “1. Verify your email domain in Featureflip”Do this first, because the connection test only passes for an email on a verified domain.
- In Featureflip, open Organization Settings and scroll to the Single sign-on card.
- Under Domains, enter your domain in Add a domain and click Add domain.
- Create the DNS TXT record shown (TXT name and TXT value) at your DNS provider.
- Click Verify. The badge turns Verified once the record is visible, which can take a few minutes.
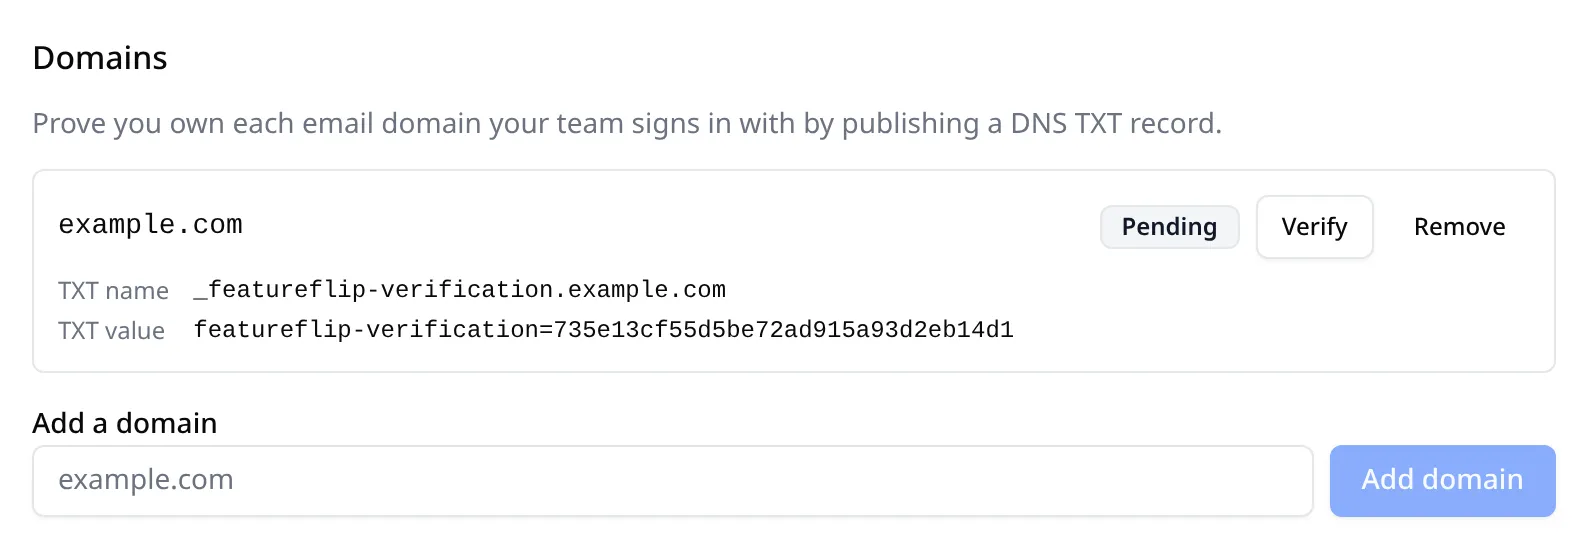
To see whether the record has propagated before you click Verify:
dig +short TXT _featureflip-verification.example.comKeep the record in place afterwards. Featureflip re-checks it daily.
2. Create the app integration in Okta
Section titled “2. Create the app integration in Okta”If you manage Okta with Terraform, Set up Okta with Terraform covers this step and step 5. Then come back for step 3.
-
In the Okta Admin Console, go to Applications > Applications and click Create App Integration.
-
For Sign-in method, choose OIDC - OpenID Connect. For Application type, choose Web Application. Click Next.
-
Set App integration name to
Featureflip. -
Under Grant type, keep Authorization code selected. Featureflip doesn’t need the others.
-
In Sign-in redirect URIs, remove the example and add:
https://api.featureflip.io/api/management/v1/sso/oidc/callbackThe same value is in Featureflip under Redirect URI (paste into your IdP), with a Copy button.
-
Leave Sign-out redirect URIs empty.
-
Under Assignments, choose who can use Featureflip. Limit access to selected groups is the usual choice. Pick the group that should have access.
-
Click Save.
Okta opens the new app’s General tab. Under Client Credentials, copy the Client ID. Under Client Secrets, copy the secret. Keep both for the next step. Client authentication should be Client secret, which is the default for a web application.
3. Find your issuer URL
Section titled “3. Find your issuer URL”For most Okta orgs the issuer is your Okta domain, with nothing after it:
https://acme.okta.comUse your own domain in place of acme.okta.com. If you sign in to Okta through a custom domain such as login.acme.com, the issuer uses that domain instead.
If your team uses a custom authorization server (under Security > API), its issuer includes a path, such as https://acme.okta.com/oauth2/default. That works too. Use the Issuer URI Okta shows for that server.
Either way, you don’t have to get it perfect. When you save, Featureflip reads Okta’s discovery document, and if the value you typed differs from what Okta reports, the error message quotes the exact issuer to use.
You can also ask Okta directly. The issuer field of the discovery document is the value to paste:
# Org authorization servercurl -s https://acme.okta.com/.well-known/openid-configuration | jq -r .issuer
# Custom authorization servercurl -s https://acme.okta.com/oauth2/default/.well-known/openid-configuration | jq -r .issuer
4. Save the connection in Featureflip
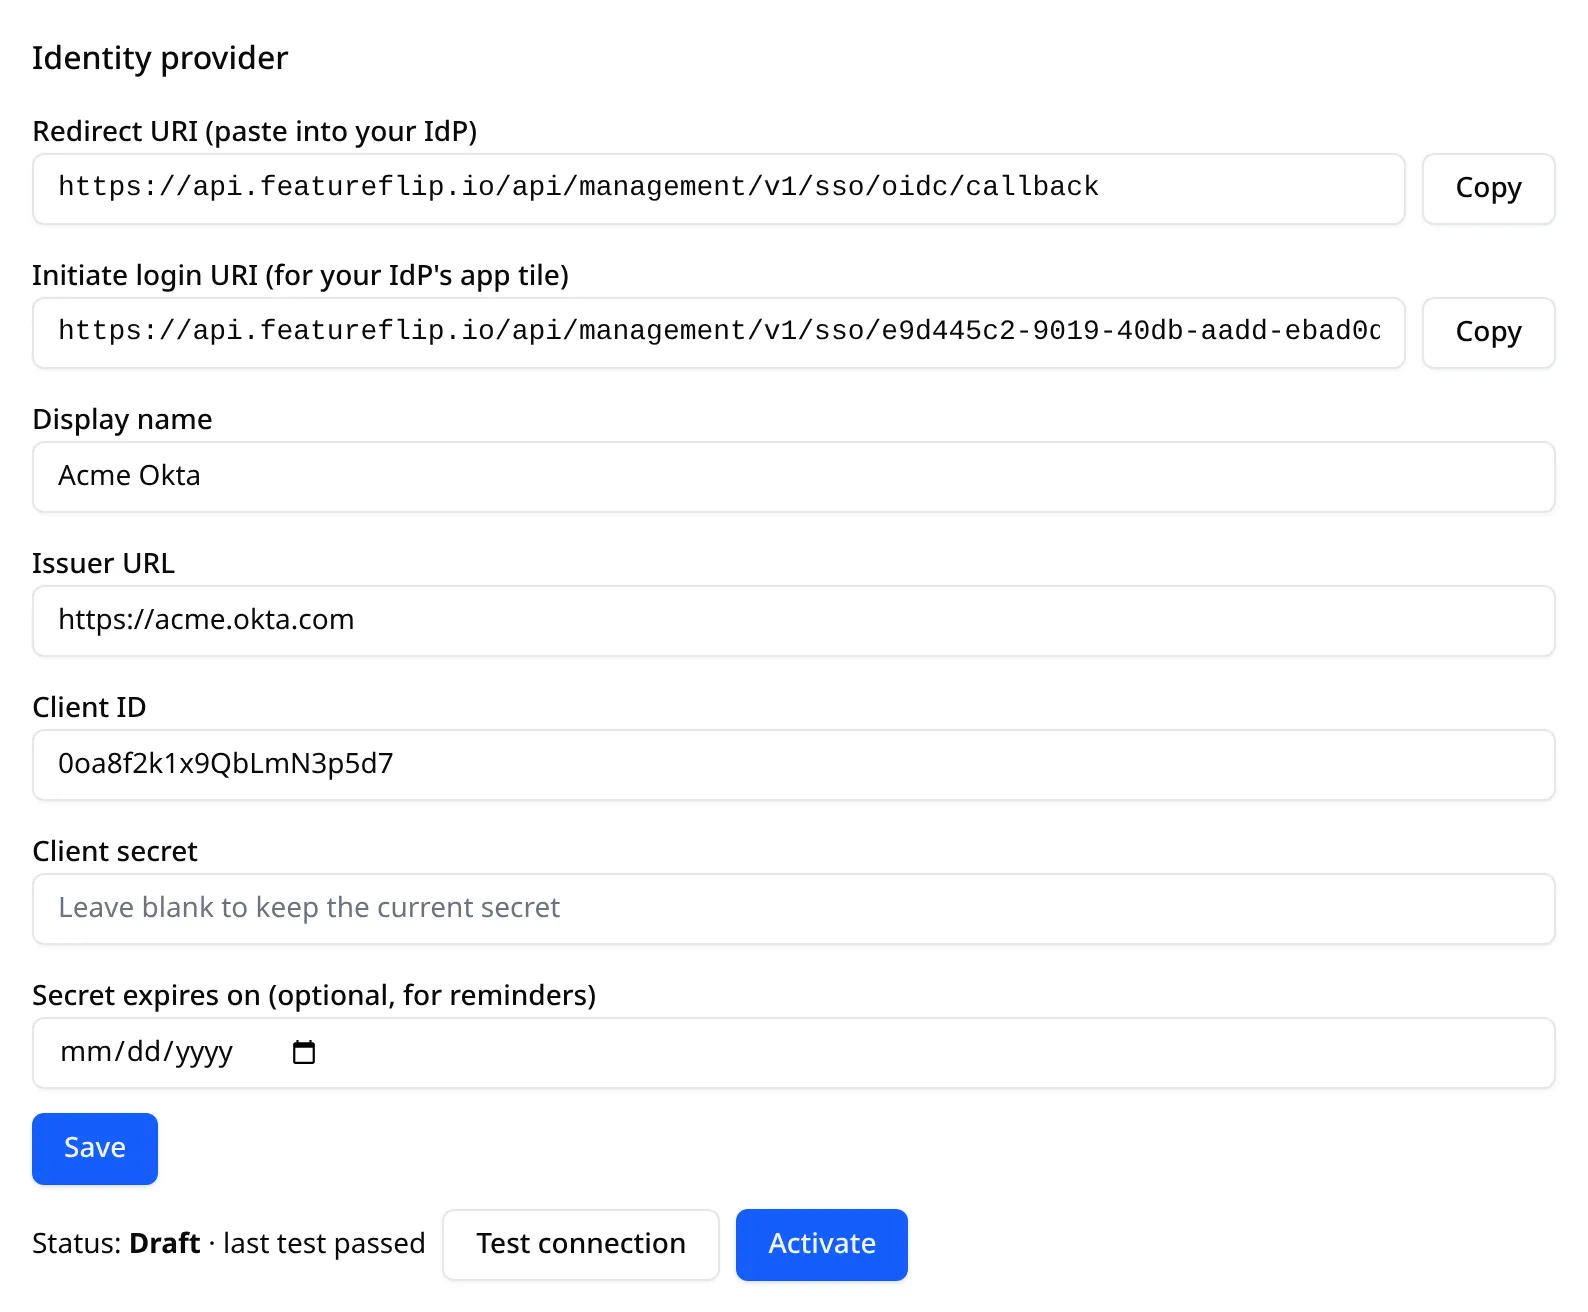
Section titled “4. Save the connection in Featureflip”Back in the Single sign-on card, fill in Identity provider:
| Field | Value |
|---|---|
| Display name | For example, Okta |
| Issuer URL | The issuer from step 3 |
| Client ID | The Client ID from Okta |
| Client secret | The secret from Okta |
| Secret expires on | Leave empty unless your team sets secrets to expire. Okta’s client secrets don’t expire unless you rotate them. |
Click Save. The card now shows an Initiate login URI (for your IdP’s app tile).
5. Add the Featureflip tile to Okta (optional)
Section titled “5. Add the Featureflip tile to Okta (optional)”To let people open Featureflip from their Okta End-User Dashboard:
- In Okta, open the Featureflip app and edit General Settings.
- Set Login initiated by to Either Okta or App.
- Paste the Initiate login URI from Featureflip into Initiate login URI.
- Turn on displaying the application icon to users, then save.
Clicking the tile opens a Featureflip page with a Continue button, and clicking that starts the same sign-in as Continue with SSO. The extra click is on purpose: it stops another website from starting a sign-in for someone without their knowledge.
6. Test and activate
Section titled “6. Test and activate”- In Featureflip, click Test connection. Okta asks you to sign in, then sends you back to Organization Settings. A passing test shows “Connection test passed. You can activate single sign-on.”
- Click Activate.
The Okta account you test with must be assigned to the app and have an email on your verified domain. The test doesn’t create an account or a session.
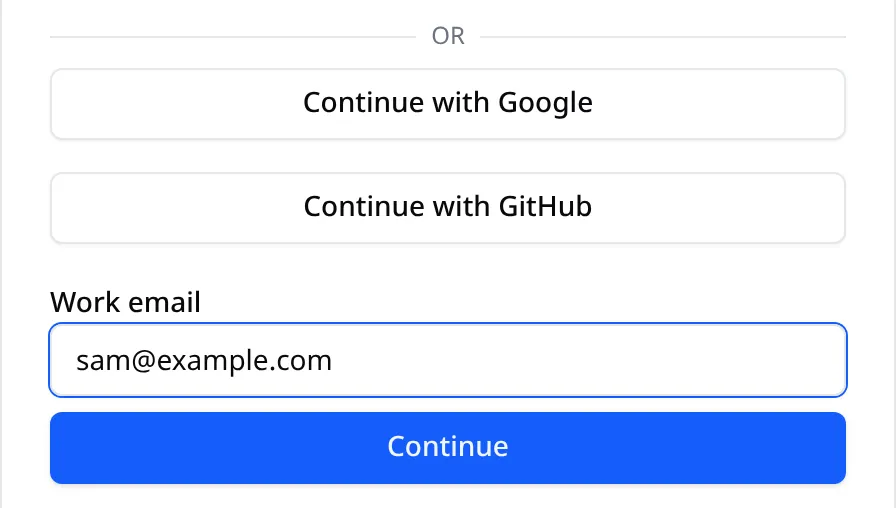
Your team can now click Continue with SSO on the Featureflip sign-in page and enter their work email.
7. Choose the access policy and, optionally, require SSO
Section titled “7. Choose the access policy and, optionally, require SSO”Under Access policy:
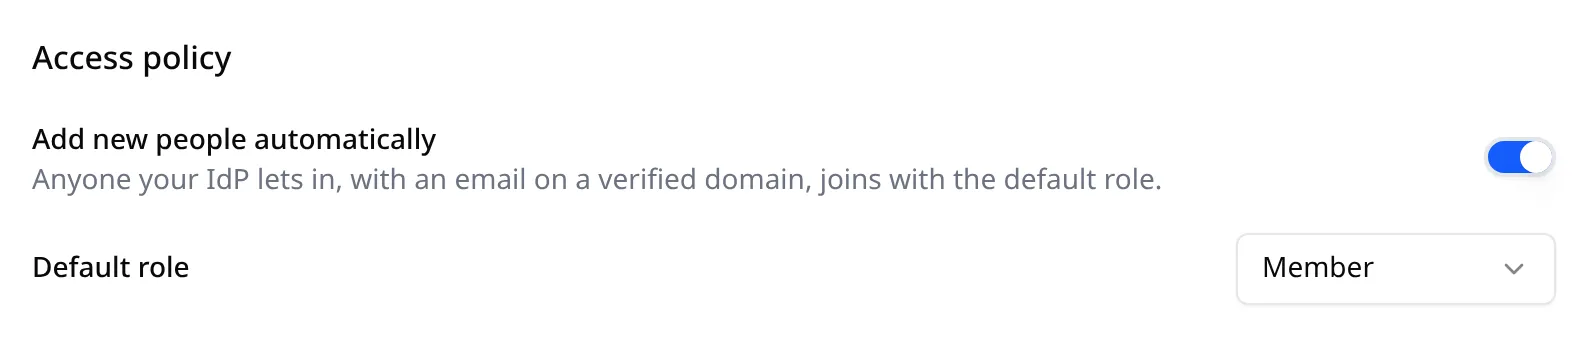
- Add new people automatically lets anyone assigned to the app in Okta join Featureflip with the Default role you choose. Turn it off if you’d rather invite people one by one.
- Require single sign-on makes Okta the only way into your organization. Owners can still sign in with their Featureflip password, as a recovery path that’s written to the audit log.
MFA belongs in Okta once SSO is on, and an Okta authentication policy is the place to require it. Featureflip’s own two-factor prompt only appears for people who turned it on for their account.
Set up Okta with Terraform
Section titled “Set up Okta with Terraform”The Okta Terraform provider can create the app integration from step 2, assign it to a group, and add the dashboard tile from step 5. Replace Engineering with the group that should have access.
terraform {  required_providers {    okta = { source = "okta/okta", version = "~> 7.0" }  }}
variable "featureflip_initiate_login_uri" {  description = "Initiate login URI from Featureflip's Single sign-on card. Leave null until the connection is saved."  type        = string  default     = null}
data "okta_group" "featureflip_users" {  name = "Engineering"}
resource "okta_app_oauth" "featureflip" {  label                      = "Featureflip"  type                       = "web"  grant_types                = ["authorization_code"]  response_types             = ["code"]  token_endpoint_auth_method = "client_secret_basic"  redirect_uris              = ["https://api.featureflip.io/api/management/v1/sso/oidc/callback"]
  # The Okta dashboard tile. Needs the URI Featureflip shows after you save the connection.  login_mode = var.featureflip_initiate_login_uri == null ? "DISABLED" : "SPEC"  login_uri  = var.featureflip_initiate_login_uri  hide_web   = var.featureflip_initiate_login_uri == null  hide_ios   = true}
resource "okta_app_group_assignments" "featureflip" {  app_id = okta_app_oauth.featureflip.id
  group {    id = data.okta_group.featureflip_users.id  }}
output "client_id" {  value = okta_app_oauth.featureflip.client_id}
output "client_secret" {  value     = okta_app_oauth.featureflip.client_secret  sensitive = true}
Run it twice. The first terraform apply creates the app with no tile. Read the credentials for step 4 with terraform output client_id and terraform output -raw client_secret, then save the connection in Featureflip. Copy the Initiate login URI it shows and apply again:
terraform apply -var 'featureflip_initiate_login_uri=https://api.featureflip.io/api/management/v1/sso/<connection-id>/start'The client secret is stored in your Terraform state in plain text, so keep that state somewhere encrypted.
Offboarding
Section titled “Offboarding”Unassigning or deactivating someone in Okta stops them signing in again. Removing a user at your IdP ends their sessions within 24 hours. Also remove them from the organization in Featureflip to cut off their API tokens.
Troubleshooting
Section titled “Troubleshooting”“The provider identifies itself as ”…”. Use that exact value as the issuer.” Copy the quoted issuer into Issuer URL. The usual cause is a trailing slash, or the org domain entered while the custom authorization server’s issuer is expected (or the reverse).
“Your identity provider rejected the test sign-in. Check the client ID and secret.” Copy both again from the app’s General tab. Check that the secret you pasted is still active under Client Secrets.
Okta shows an error about the redirect URI.
The Sign-in redirect URIs entry must match the Featureflip value exactly, including https and the full path.
Okta says you aren’t assigned to the application. Assign the user, or one of their groups, to the Featureflip app under Assignments.
“The test sign-in worked, but that account’s email isn’t on a verified domain.” The Okta user’s primary email is on a domain you haven’t verified in Featureflip. Verify it, or test with an account on a verified domain.
The single sign-on overview lists the remaining messages.