

Set Up SSO with Microsoft Entra ID (Azure AD)
This guide connects your Microsoft Entra ID tenant to Featureflip so your team signs in with their Microsoft work account. Entra ID was called Azure Active Directory (Azure AD) until 2023, and the steps are the same whichever name your admin center shows. Plan on about twenty minutes, most of it in the Entra admin center.
SSO is on the Business plan and above. The single sign-on overview explains the settings that are the same for every provider, such as the access policy and what requiring SSO does.
You need:
- An Entra account that can register applications (Application Developer or above) and, for step 4, grant admin consent (Cloud Application Administrator or above).
- The Owner role in your Featureflip organization.
- DNS access for your team’s email domain.
1. Verify your email domain in Featureflip
Section titled “1. Verify your email domain in Featureflip”Do this first, because the connection test only passes for an email on a verified domain.
- In Featureflip, open Organization Settings and scroll to the Single sign-on card.
- Under Domains, enter your domain in Add a domain and click Add domain.
- Create the DNS TXT record shown (TXT name and TXT value) at your DNS provider.
- Click Verify. The badge turns Verified once the record is visible, which can take a few minutes.
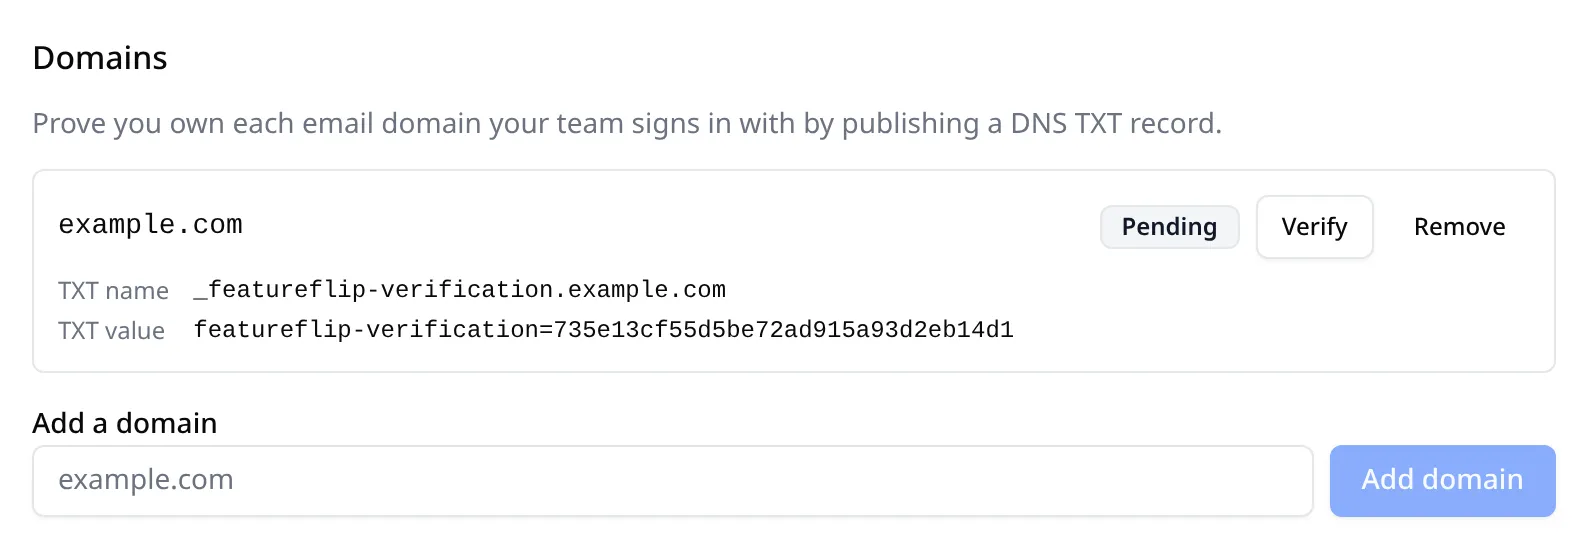
To see whether the record has propagated before you click Verify:
dig +short TXT _featureflip-verification.example.comKeep the record in place afterwards. Featureflip re-checks it daily.
2. Register the app in Entra ID
Section titled “2. Register the app in Entra ID”Steps 2, 3, 4 and 7 can also be done from code. See Set up Entra ID with Terraform or the Azure CLI, then pick up again at step 5.
-
Sign in to the Microsoft Entra admin center.
-
Go to Entra ID > App registrations and select New registration.
-
Set Name to
Featureflip. -
Under Supported account types, choose the single-tenant option (Single tenant only, or Accounts in this organizational directory only in older versions of the admin center). Featureflip refuses multi-tenant sign-in, so the other options won’t work.
-
Under Redirect URI, choose the Web platform and enter:
https://api.featureflip.io/api/management/v1/sso/oidc/callbackThe same value is in Featureflip under Redirect URI (paste into your IdP), with a Copy button.
-
Select Register.
On the app’s Overview page, copy the Application (client) ID and the Directory (tenant) ID. You need both.
3. Create a client secret
Section titled “3. Create a client secret”- In the app, open Certificates & secrets > Client secrets and select New client secret.
- Add a description, such as
Featureflip SSO, and pick an expiry. Entra secrets always expire, after two years at most. - Select Add, then copy the Value column right away. Entra only shows it once. The Secret ID next to it is a different thing and won’t work.
Write down the expiry date. You’ll enter it in Featureflip in step 5 so you get a reminder before it lapses. Once a secret expires, nobody can sign in with SSO until a new one is saved.
4. Allow the sign-in scopes
Section titled “4. Allow the sign-in scopes”Featureflip asks for the openid, email and profile scopes. Granting consent once, as an admin, means your team isn’t prompted on their first sign-in, and it’s required if your tenant blocks user consent.
- Open API permissions and select Add a permission > Microsoft Graph > Delegated permissions.
- Check email, openid and profile, then select Add permissions.
- Select Grant admin consent for your tenant, and confirm.
Next, open Token configuration, select Add optional claim, choose the ID token type and add email and xms_edov. The first puts the email address in the sign-in token. The second tells Featureflip the address is on a domain your tenant has verified, and Entra only sends it alongside email.
Don’t skip xms_edov. Without it a first SSO sign-in can’t connect to someone’s existing Featureflip account or accept an invitation sent to them, so Test connection in step 6 won’t pass.
5. Save the connection in Featureflip
Section titled “5. Save the connection in Featureflip”Your issuer is built from the Directory (tenant) ID you copied in step 2:
https://login.microsoftonline.com/<Directory (tenant) ID>/v2.0Use the tenant ID itself, the long value made of letters, digits and dashes, and keep /v2.0 at the end. Entra’s shared endpoints (/common, /organizations and /consumers) are refused because they would accept accounts from any tenant.
If you only know your domain, Entra will translate it. Ask for the discovery document with a domain verified in your tenant where the tenant ID would go, and the answer carries the tenant-specific issuer:
curl -s https://login.microsoftonline.com/example.com/v2.0/.well-known/openid-configuration | jq -r .issuer# https://login.microsoftonline.com/9f3c2a71-4b8e-4d25-a6f0-2c7e1b5d8a43/v2.0With the Azure CLI signed in to the right tenant, az account show --query tenantId -o tsv prints the tenant ID on its own.
Back in the Single sign-on card, fill in Identity provider:
| Field | Value |
|---|---|
| Display name | For example, Entra ID |
| Issuer URL | The issuer above |
| Client ID | The Application (client) ID |
| Client secret | The secret Value from step 3 |
| Secret expires on | The expiry date from step 3. Owners get an email 30 days and 7 days before it. |
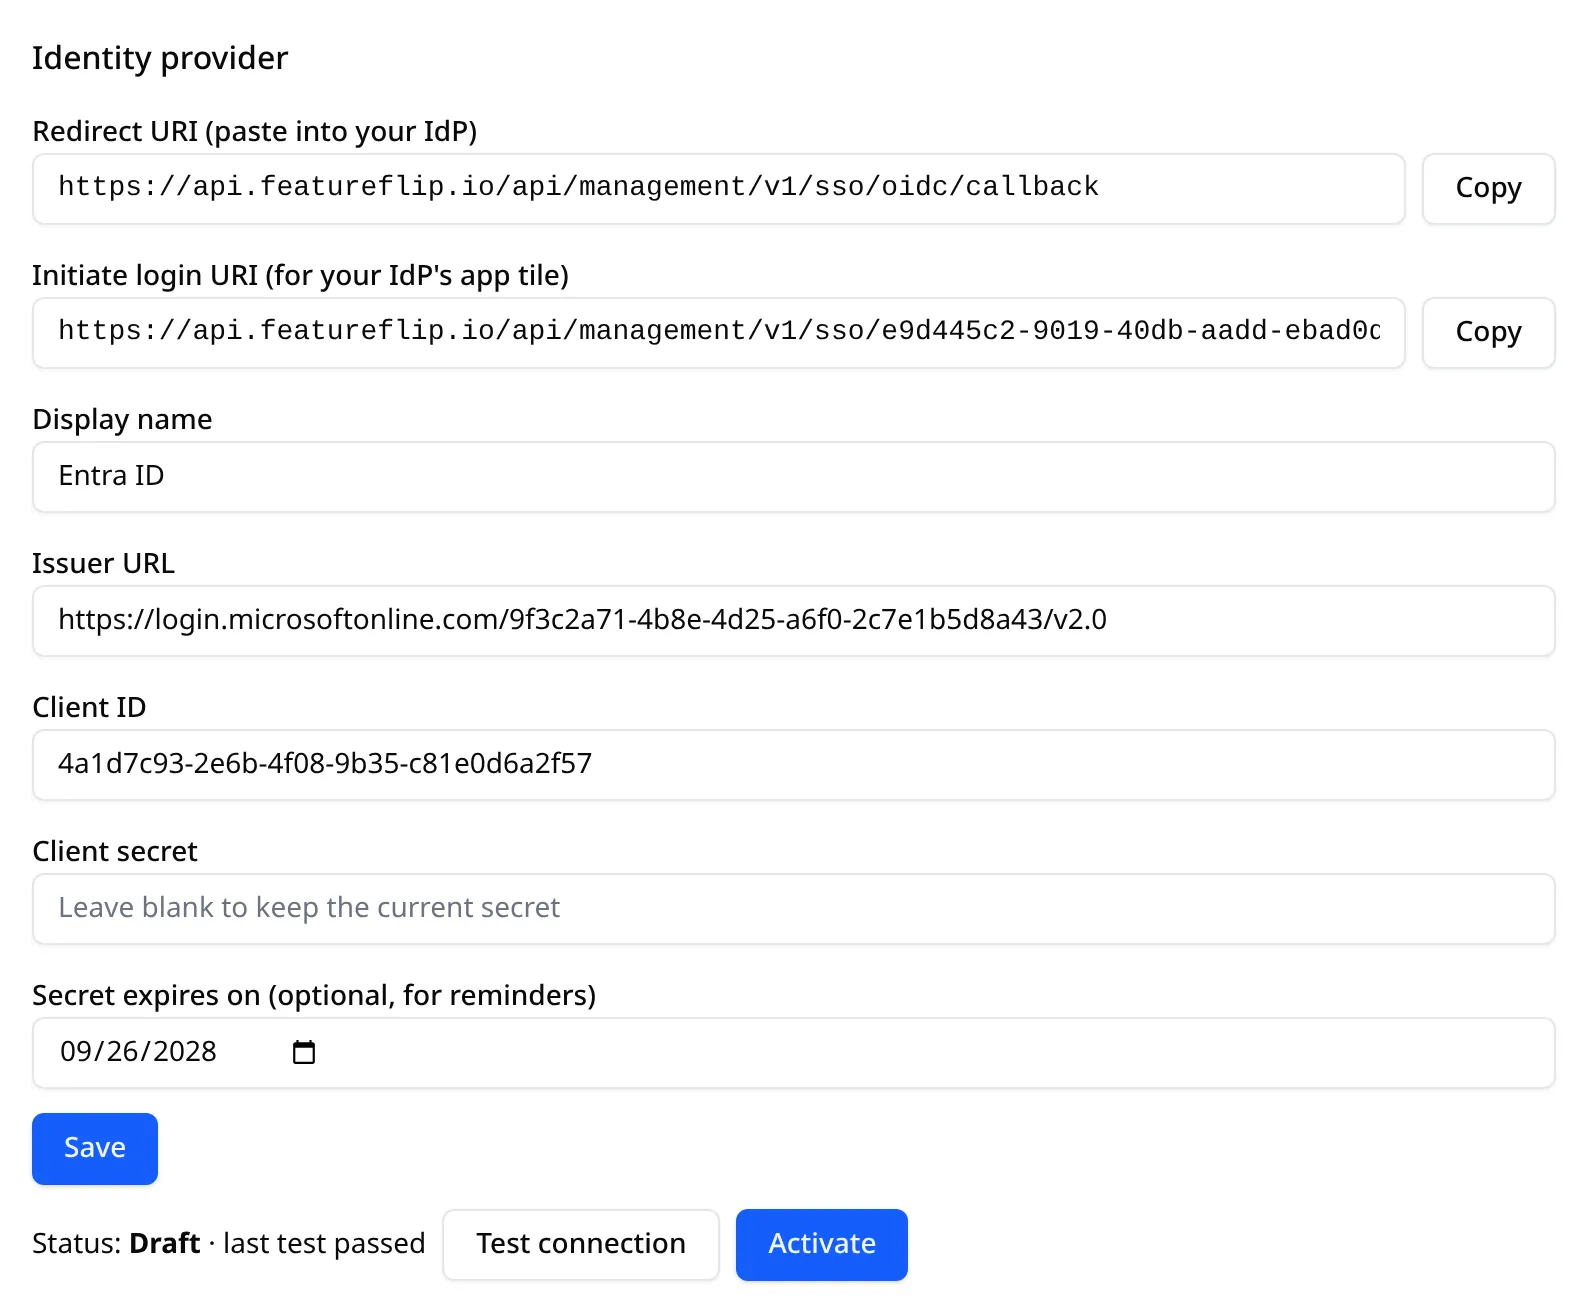
Click Save. If the issuer is off, for instance with your domain name where the tenant ID should be, the error message quotes the exact value Entra reports. Copy that in and save again.
The card now shows an Initiate login URI (for your IdP’s app tile). You’ll use it in step 7.
6. Test and activate
Section titled “6. Test and activate”- In Featureflip, click Test connection. After a Microsoft sign-in you land back in Organization Settings. A passing test shows “Connection test passed. You can activate single sign-on.”
- Click Activate.
The account you test with needs an email on your verified domain. The test doesn’t create an account or a session.
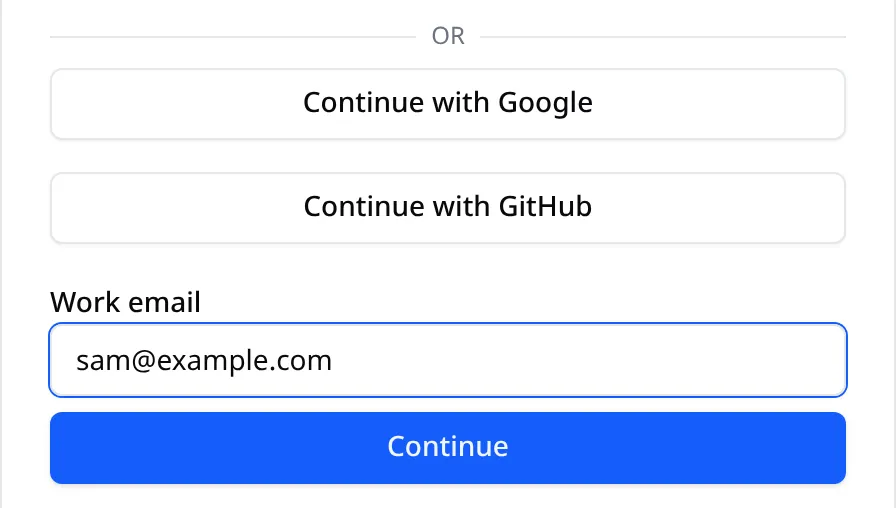
Your team can now click Continue with SSO on the Featureflip sign-in page and enter their work email.
7. Limit who can sign in and add the My Apps tile
Section titled “7. Limit who can sign in and add the My Apps tile”By default, every account in your tenant can sign in to a newly registered app. To restrict Featureflip to chosen people:
- Go to Entra ID > Enterprise apps and open Featureflip.
- Under Properties, set Assignment required? to Yes and save.
- Under Users and groups, add the users or groups that should have access.
To show Featureflip in your team’s My Apps portal, set Visible to users? to Yes on the same Properties page. Then, in the app registration, open Branding & properties and paste the Initiate login URI from Featureflip into Home page URL. The tile then opens a Featureflip page with a Continue button, and clicking that starts the same sign-in as Continue with SSO.
8. Choose the access policy and, optionally, require SSO
Section titled “8. Choose the access policy and, optionally, require SSO”Under Access policy:
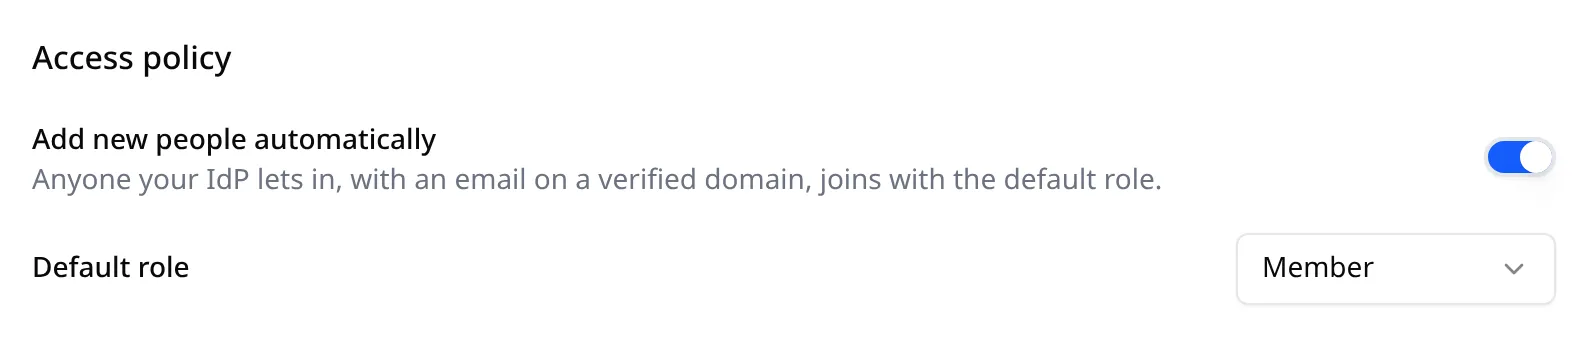
- Add new people automatically lets anyone Entra admits, with an email on a verified domain, join Featureflip with the Default role you choose. Turn it off if you’d rather invite people one by one.
- Require single sign-on makes Entra ID the only way in. The overview explains the Owner recovery path that stays open.
Require MFA through an Entra Conditional Access policy. Featureflip adds its own two-factor step only for people who turned it on for their account.
Set up Entra ID with Terraform or the Azure CLI
Section titled “Set up Entra ID with Terraform or the Azure CLI”Both versions below register the app, create the client secret, grant admin consent for openid, email and profile, and turn on Assignment required? so only the people you assign can sign in. Afterward, carry on from step 5.
Terraform
Section titled “Terraform”This uses the AzureAD provider and limits access to one group. Replace Engineering with your own group, and set end_date to the secret expiry you want (two years at most).
terraform {  required_providers {    azuread = { source = "hashicorp/azuread", version = "~> 3.0" }  }}
variable "featureflip_initiate_login_uri" {  description = "Initiate login URI from Featureflip's Single sign-on card. Leave null until the connection is saved."  type        = string  default     = null}
data "azuread_client_config" "current" {}data "azuread_application_published_app_ids" "well_known" {}
data "azuread_group" "featureflip_users" {  display_name = "Engineering"}
resource "azuread_service_principal" "msgraph" {  client_id    = data.azuread_application_published_app_ids.well_known.result["MicrosoftGraph"]  use_existing = true}
resource "azuread_application" "featureflip" {  display_name     = "Featureflip"  sign_in_audience = "AzureADMyOrg"
  web {    redirect_uris = ["https://api.featureflip.io/api/management/v1/sso/oidc/callback"]    homepage_url  = var.featureflip_initiate_login_uri  }
  required_resource_access {    resource_app_id = data.azuread_application_published_app_ids.well_known.result["MicrosoftGraph"]
    dynamic "resource_access" {      for_each = ["openid", "email", "profile"]      content {        id   = azuread_service_principal.msgraph.oauth2_permission_scope_ids[resource_access.value]        type = "Scope"      }    }  }
  optional_claims {    id_token {      name = "email"    }    # Confirms the email is on a domain your tenant verified. Needed to link existing    # Featureflip accounts and accept invitations.    id_token {      name = "xms_edov"    }  }}
resource "azuread_application_password" "featureflip" {  application_id = azuread_application.featureflip.id  display_name   = "Featureflip SSO"  end_date       = "2028-09-26T00:00:00Z"}
resource "azuread_service_principal" "featureflip" {  client_id                    = azuread_application.featureflip.client_id  app_role_assignment_required = true}
# Admin consent for openid, email and profile, so nobody sees a consent prompt.resource "azuread_service_principal_delegated_permission_grant" "featureflip" {  service_principal_object_id          = azuread_service_principal.featureflip.object_id  resource_service_principal_object_id = azuread_service_principal.msgraph.object_id  claim_values                         = ["openid", "email", "profile"]}
# Only members of this group can sign in (Assignment required? = Yes above).resource "azuread_app_role_assignment" "featureflip_users" {  app_role_id         = "00000000-0000-0000-0000-000000000000"  principal_object_id = data.azuread_group.featureflip_users.object_id  resource_object_id  = azuread_service_principal.featureflip.object_id}
output "issuer" {  value = "https://login.microsoftonline.com/${data.azuread_client_config.current.tenant_id}/v2.0"}
output "client_id" {  value = azuread_application.featureflip.client_id}
output "client_secret" {  value     = azuread_application_password.featureflip.value  sensitive = true}
output "client_secret_expires_on" {  value = azuread_application_password.featureflip.end_date}
After terraform apply, the outputs hold everything step 5 asks for: terraform output issuer, terraform output client_id, terraform output -raw client_secret and terraform output client_secret_expires_on. Once the connection is saved, apply again with -var 'featureflip_initiate_login_uri=…' to add the My Apps tile. To show that tile, also set Visible to users? to Yes as described in step 7.
The client secret sits in your Terraform state in plain text, so keep that state somewhere encrypted.
Azure CLI
Section titled “Azure CLI”Sign in with az login as someone who can grant admin consent, then run:
REDIRECT_URI=https://api.featureflip.io/api/management/v1/sso/oidc/callbackGRAPH=00000003-0000-0000-c000-000000000000   # Microsoft Graph
# Step 2: register a single-tenant web appAPP_ID=$(az ad app create \  --display-name Featureflip \  --sign-in-audience AzureADMyOrg \  --web-redirect-uris "$REDIRECT_URI" \  --optional-claims '{"idToken":[{"name":"email"},{"name":"xms_edov"}]}' \  --query appId -o tsv)
# Step 3: a client secret that expires in two years (printed once, so store it now)az ad app credential reset --id "$APP_ID" \  --display-name "Featureflip SSO" --years 2 --append \  --query password -o tsv
# Step 4: openid, email and profile, with admin consentaz ad app permission add --id "$APP_ID" --api "$GRAPH" --api-permissions \  37f7f235-527c-4136-accd-4a02d197296e=Scope \  64a6cdd6-aab1-4aaf-94b8-3cc8405e90d0=Scope \  14dad69e-099b-42c9-810b-d002981feec1=Scopeaz ad sp create --id "$APP_ID"az ad app permission admin-consent --id "$APP_ID"
# Step 7: only assigned users and groups can sign inaz ad sp update --id "$APP_ID" --set appRoleAssignmentRequired=true
# Values for step 5echo "Issuer:    https://login.microsoftonline.com/$(az account show --query tenantId -o tsv)/v2.0"echo "Client ID: $APP_ID"
The three GUIDs are Microsoft Graph’s openid, email and profile delegated permissions, which have the same IDs in every tenant. Assign users or groups afterward under Enterprise apps > Featureflip > Users and groups, as in step 7.
Offboarding
Section titled “Offboarding”Removing someone’s assignment, or disabling their account in Entra, stops them signing in again. Removing a user at your IdP ends their sessions within 24 hours. Also remove them from the organization in Featureflip to cut off their API tokens.
Troubleshooting
Section titled “Troubleshooting”“Use your tenant-specific issuer (https://login.microsoftonline.com//common or /organizations. Replace that segment with your Directory (tenant) ID.
“The provider identifies itself as ”…”. Use that exact value as the issuer.”
Copy the quoted issuer into Issuer URL. This usually means a domain name was used in place of the tenant ID, or /v2.0 is missing.
“Your identity provider rejected the test sign-in. Check the client ID and secret.” Check that you pasted the secret’s Value and not its Secret ID, and that the secret hasn’t expired.
Microsoft shows a redirect URI mismatch error (AADSTS50011). Under Authentication, the Web redirect URI must match the Featureflip value exactly.
Microsoft says the user isn’t assigned to the app (AADSTS50105). With Assignment required? on, add the user or one of their groups under Users and groups.
“The test sign-in worked, but that account’s email isn’t on a verified domain.”
Featureflip uses the account’s email address, or its user principal name when the account has no email. Whichever it is must be on a domain you verified. Accounts whose sign-in name is on onmicrosoft.com need an email address on your own domain.
“Your identity provider didn’t confirm your email address, so we can’t use it to sign in to an existing account or accept an invitation.” (or, from Test connection, “your identity provider didn’t confirm that account’s email”)
The ID token is missing email or xms_edov, or xms_edov is false. Add both under Token configuration as in step 4. An account with no email address fails too, because its user principal name can’t be confirmed this way. It’s only true when the address is on a domain verified in your tenant, so check Domain names in Entra if it still fails.
The single sign-on overview lists the remaining messages.